DCC175 with issues, new belt didn't fix it

Hello everybody out there.DCC175_repair AdV.pdf (1.5 MB)

I’m a new patron of the DCC museum and first time user of this forum. I’ve owned my DCC175 and DCC600 since new and have enjoyed both enormously over the years. My 600 in in untouched condition and working perfectly fine apart from occasionally needing a light tap on the tray to open the cassette compartment (maybe known issue and eventually leading to problems?).
This topic is about my DCC175 of which I have replaced the belt successfully in 2016 thanks to an instruction video on YouTube (if I recall correctly in French).

Recently it starting playing up again. The symptoms: after inserting a dcc and pressing PLAY/SIDE it would show normal messages in the display, but wouldn’t produce any sound. You could hear the motor whirr for a few seconds, it would switch to side B, same whirring for a few seconds and would shut itself off. Although it’s four years ago, I believe I had the same symptoms then, so I decided the replace the belt again.

Opening up to the point where you can replace the belt was not too hard. First point of doubt arose here: the belt didn’t look that bad and spinning the motor pulley drove all the little pulleys seemingly without issue. But being at this point and having a spare belt in my drawer I decided to simply replace it anyway. Second point of doubt: the new belt (I ordered 2 in 2016) is in unloaded condition about 2/3 of the length of the old one. Did the old one stretch that much? The new one does fit, but seems to be under quite high tension, maybe too high tension? How great are the chances that having ordered 2 belts a mistake was made and of of the two is actually incorrect? Very small, I’d say, but a little nagging doubt still there.

Next bit of doubt - the A-B side switch position. From my first belt replacement I made experience the hard way, having to reopen and toggle the switch to get it to working again. Last time I had to switch the from L to R (or the other way around, cannot remember). This time on opening the switch was in the middle position. Confusion… I thought there were only two positions for this switch. Maybe it stopped working because the A-B switch is in an undefined position. Anyway, to keep a long story short I rebuilt the player 3 times (sigh) with the switch in all possible positions (attached picture tells the process I followed in more detail), but couldn’t get it back to life. In the two first positions (L and R) I was getting some message, from recollection something like ---------PLAY--------- (not something I believe I’ve ever seen before) and after the third rebuild with the switch back in the middle it only shows a blinking cursor in the left upper position of the display. In all instances there was some whirring and clicking/switching/mechanical noise coming from the machine which stopped after 30 secs or so.

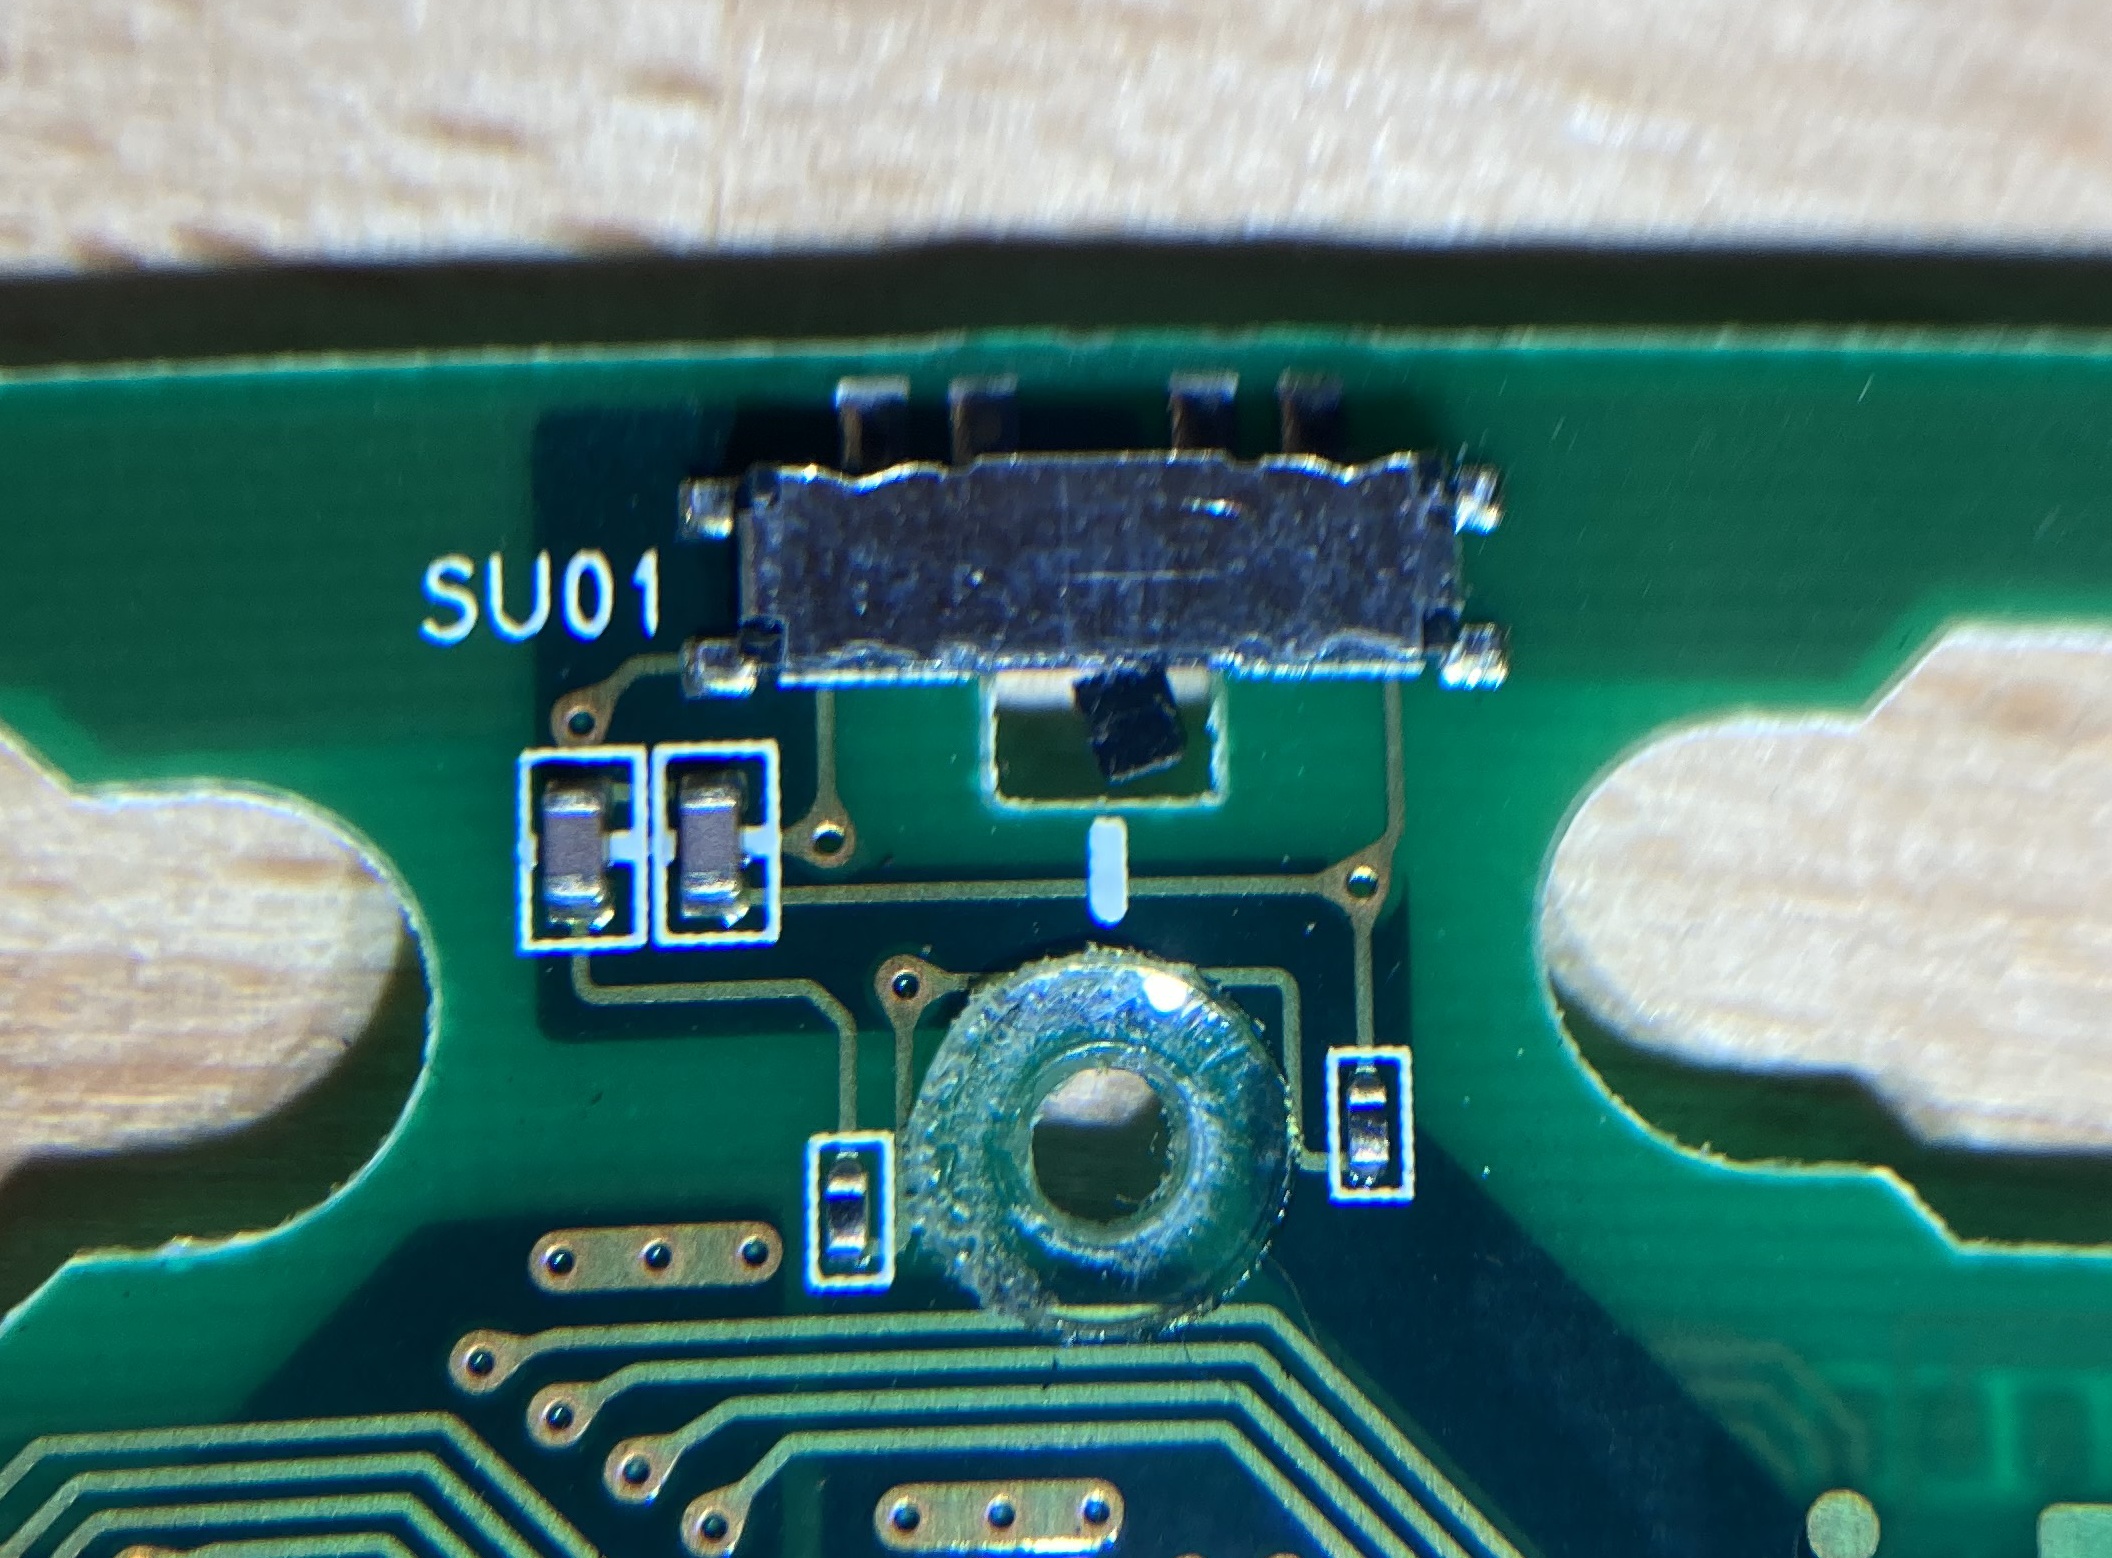
Next point of potential concern: alignment of the cassette identification switches (the ones needing unsoldering when getting to the belt) is less than ideal (see attached pictures - apologies for poor picture quality, hopefully the essence is visable).

To top it off… I tried to run the service setting mode. Have tried many times, but it will not go into this mode. All I’m getting is the blinking cursor again and motor whirring.

If anyone has any suggestions what I could try as a next step would be greatly appreciated.

1 Like

Hi Alex,
Thanks for joining,

I can see nothing wrong with any of tour steps. The location of the a-b switch does not matter. If the latch is attached correctly it should play.
Have you checked if that switch is still ok? It is located on the board that mounts on top of the a-b mechanism part.

The whirling sound indicates that the player is trying to start and It might Also be a motor / mechanism problem as the belt seems ok in the pictures. All other switches engage, otherwise you would not hear the whirling sound.

Is the motor spinning freely when moving by hand, like in the video?

We would be more then happy to put it on the bench for you.

Ralf

Hi Ralf,

Thanks for the quick reply.

Yes, with the belt removed the motor spins freely. However with the belt fitted, I felt that it required a bit more effort. As mentioned I was a little worried that maybe the belt was too short/tight.

What would the unloaded length of the belt have to be if it’s the correct one? (just as a rough check to make sure it is truly the correct one)?

Regarding the switch that you’re asking me to check, let me make sure I’m looking at the correct component. I’ve added a picture of the board that is fitted on top of the a-b mechanism, this is the one that needs to be unsoldered, correct?
Is the switch visible from this side or do I need to look on the other side (and hence unsolder first)?

I appreciate the offer to have it sorted out for me. Maybe it’ll come to that, but shipment from Australia to the US will be quite costly and will take forever. So I’d like to think of that as my last resort.

Can I maybe ask a couple more specific questions?
I’m a bit confused about the statement wrt the a-b switch. In the Youtube video is explained that the a-b switch position must be memorized, if the position chances before reassembly the recorder won’t work. That’s also my experience from the first belt replacement. Did I misunderstand something?

Is there anything you can say to the point that not even the service mode can be switched on? Could that be an indication in itself?

Hi,
Looking at the picture all seems finr.
The ideal belts Length is 64mm X 0.6 alternative 0.8mm max.

The a-b switch does not need to be memorized. We mentioned it like this in the video to prevent people from breaking the small switch.

Ralf

It’s somewhat difficult to get service mode to activate on the 3rd gen portables, even if they work correctly. You have to push two buttons simultaneously 3 times if I remember correctly and if you don’t push the buttons at the same time, they will work as if you pushed the buttons separately. Keep trying.

=== Jac

1 Like

You dont need to unsolder these switches for removing the pcb. You can flip the switches out of the frame with some tweezers.

I had the issue that you mention last month. Then it was the friction in the gear that gets moved by the coil. The friction was to high and the player could not get into the right position for starting. Also it could be the case that you used oil or grease for the mechanics and spilled some on the belt now the belt does not have enough tension to pull the gear for switching sides.

1 Like

Thanks Ralf,
I measured the old belt that came off, 210 mm in length (or 105 mm as measured stretched between two points). I’m assuming your measure relates to the latter. This would confirm that the newly fitted belt is correct (my guestimate was that it was ~2/3 length from the old one). One worry less.

1 Like

Thanks Jac,
I’ll have to reassemble to keep trying. I’ll sure do in the next couple of days.

OK, I’ll have a close look at the friction in the system… might not be until the weekend until I have time, but the offered suggestions are much appreciated. I’ll keep you posted :slight_smile:

1 Like

Update: I’ve taken off the belt and measured it to have thickness 1.1 mm - that is significantly different from 64 x 0.6-0.8 mm. Per the other responses I’ve received hinting at the too high friction (or too little traction on the belt) this could be the smoking gun! I’ll see if I can get locally a belt closer to the ideal size.
Bit of good news: I have been able to get the tape detect switches properly aligned again.
But also found a bit of bad news. The tip of the A-B side slider switch that’s pointing downwards and operated by the gear operated lever is literally hanging by a thread, almost broken off. (See attached pictures). Can this be repaired, are new switches still available?

A belt that is 1.1mm can never work properly as the motor will not be able to handle it. Max is 0.8mm

1 Like

@pvdm found suitable switches on AliExpress: DCC170 with broken rec switch - FIXED -

1 Like

True, but that switch that I found was for the REC switch in the top cover of the DCC170/175. Not entirely sure it will work or fit here, but it is certainly possible.

1 Like

Looked identical on the picture, well then check the length.

Otherwise we will have one for you at the DCC Museum

1 Like

According to the service manual these are the same parts: the REV switch is SU01 and the recording switch is referred to with SD10, but in the parts list they are both 4822 277 21752. I’ll try my luck with ordering the same on-line.

3 Likes

Great that I was not so wrong after all. The part number always refers to the position, the same order number means it is the same part.

2 Likes

It feels like an eternity since I’ve been on the forum. For good reason: the mail with the switches took ages to arrive in Australia and then I was on vacation. So only a couple of days ago I’ve been able to continue with the repair of the DCC175. Very disappointingly these turned out to be not the correct ones. I fitted a new belt and a new switch into the player. The good news: it did come to life and even appeared to be playing both an analog and dcc tape briefly. The bad news: the wrong take up spindle gets activated and creates a loop of tape. In the process I’ve ruined one dcc tape. On a small separate test PCB I’ve tested 3 of the other switches (smallest quantity you could order was 10) comparing the functionality with the original switch and it’s definitely doing something else. Out of curiosity I’ve opened one up and with the bits in there it could never offer the same functionality as the original. Bummer…
So back to the offer made above.
Ralf, you mentioned that you have these switches at the museum. How much would it cost to ship 2 or 3 to Australia?

1 Like

I’m sorry. I hope it was not a prerecorded tape.

Contact Ralf at [email protected] for parts, please.

1 Like